Creating a segment
Define a new segment for the active client — name, code, colour, icon.
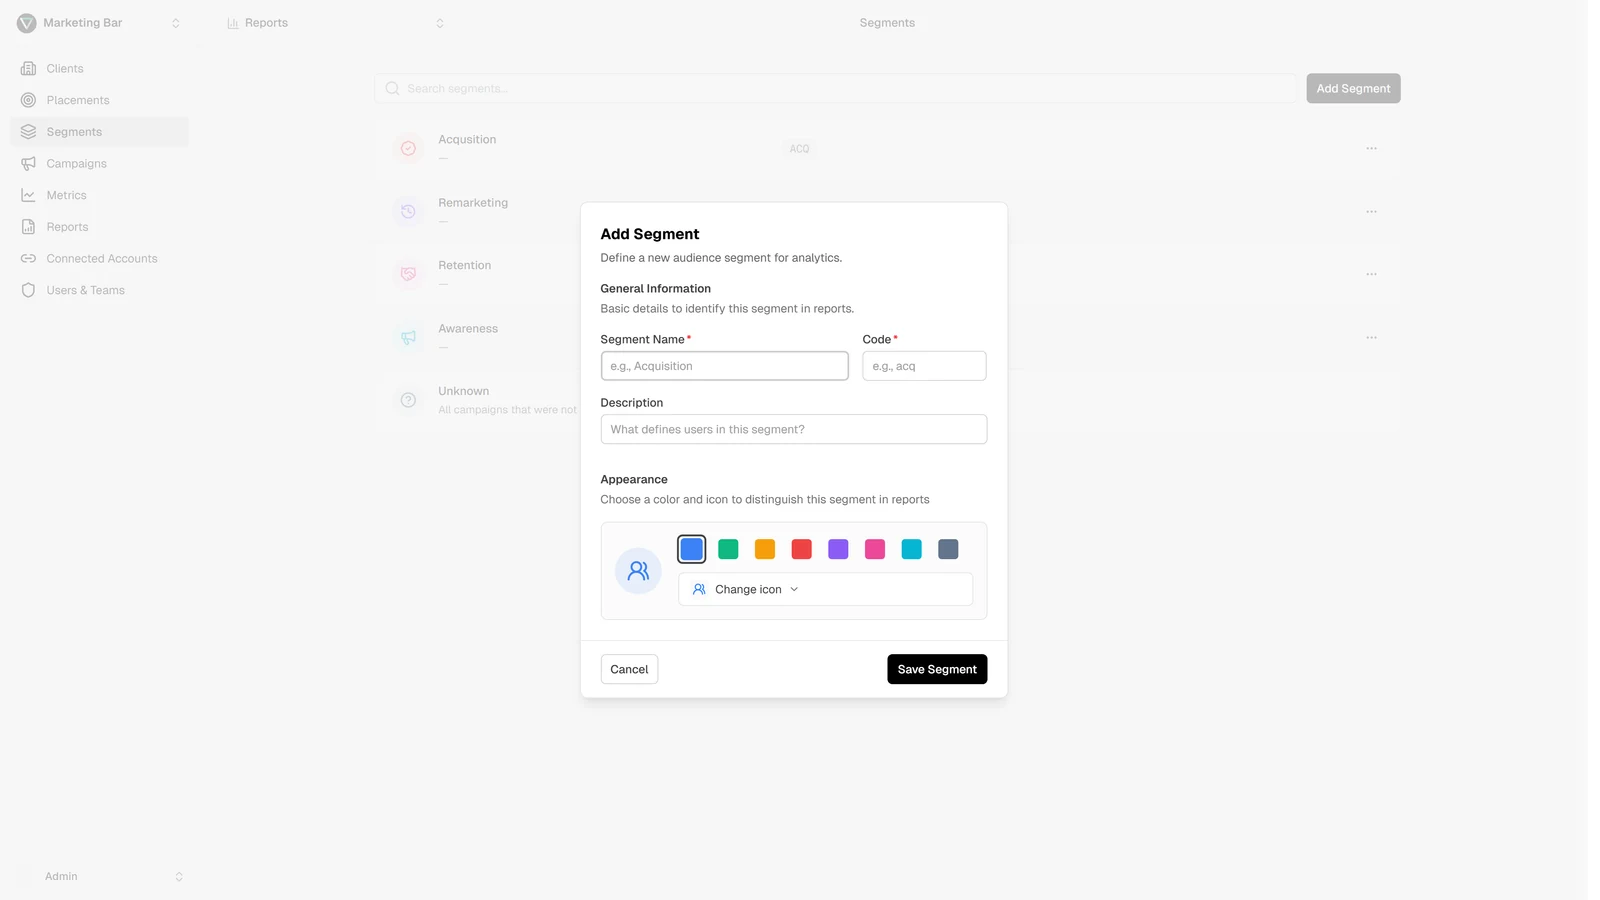
Open the active client's Segments page and click Add segment. The segment modal opens with four fields — none of them long, all of them required-ish.
Fields
Name (required)
The human-readable label that shows up in reports, tables, and chips. Examples: Acquisition, Brand, Retention, Lookalike. Free text — keep it short and recognisable.
Code (required)
A short uppercase identifier used internally. Examples: ACQ, BRAND, RET. Must be unique within the client (you can't have two segments with the same code on the same client; different clients are isolated).
The code is most visible:
- In the segments list (right column).
- As a fallback when the segment is referenced somewhere with limited space.
- In platform-side conversion or naming integrations later.
Pick something stable — renaming the code later breaks any external reference that relied on it.
Colour
A hex colour or one of the colour-picker presets. Used for:
- The dot/swatch next to the segment name everywhere it appears.
- The segment row in Segments reports.
- Visual grouping in the campaigns table.
Pick distinct colours so a stakeholder skimming a report can tell segments apart at a glance. Default presets are tuned to be perceptually distinct.
Icon
One of the Lucide icons. Shows up at the start of the segment row and in chips. Use it to reinforce the segment's intent visually (e.g. shopping-cart for Acquisition, repeat-arrow for Retention).
What happens on save
- Level creates the segment.
- The new segment appears in the table and is immediately available to assign to campaigns on the Campaigns page.
- Existing reports of type Segments don't auto-include the new segment until you edit the report and add it.
Tips
Permissions
Creating segments requires manage segments permission on the active client. Without it, the Add segment button is hidden.