Adding and managing members
Add an existing Level user to a node or invite a new one by email; assign roles; manage access.
Select a node in the organization tree to see its Members tab on the right. From here you add people, assign or change their roles at this node, and remove them.
What's in the table
The Members tab shows two kinds of rows:
- Active members — users with an actual account, currently assigned at this node. Each row shows avatar, display name, email, and role chips. Roles inherited from a parent node show with an outline-style chip; roles assigned directly at this node show with a subtle-fill chip.
- Pending invitations — invites that haven't been accepted yet. Email icon instead of avatar, a Pending badge, the elapsed time since the invitation was sent, and the role(s) the invitee will get on accept.
Adding a member
Click Add member at the top of the Members tab. The modal supports two modes:
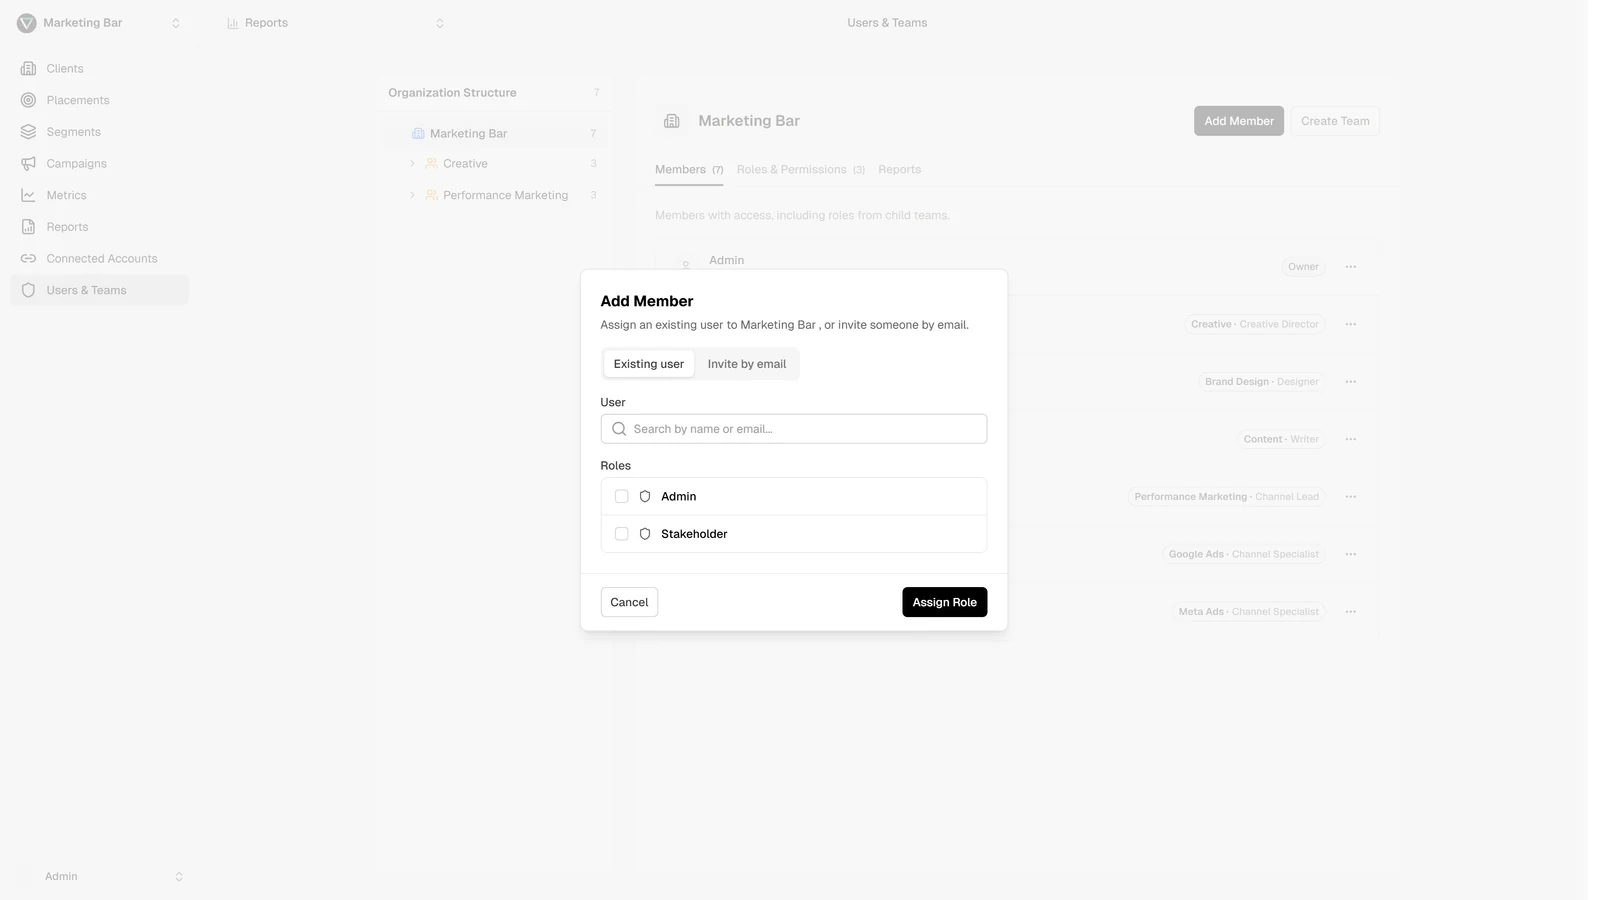
Existing user
For people who already have a Level account in this workspace.
- Type their name or email in the search box. Matches debounce at 300 ms and search across the workspace.
- Pick the user from the dropdown.
- Tick one or more roles to assign at this node — multiple is allowed.
- Save.
The user appears in the Members table immediately with the assigned roles.
Invite by email
For new people who don't have a Level account yet (or aren't in this workspace).
- Enter an email — Level validates the format.
- Pick exactly one role for the invitee — radio buttons (multi-role on invite isn't supported).
- Save.
Level sends an invitation email. The invitee shows up in the Members table with a Pending badge until they accept.
The invitee must log in with the same email the invitation was sent to. If they sign up with a different email, the invitation can't be accepted — they'll see an Email mismatch error on /invitation.
Member actions
Each member row has an action menu (kebab on desktop):
- Manage access — opens a modal where you can add or remove roles for this user at this node, and (if you have manage roles) jump into Permission Overrides for fine-grained adjustments.
- Permission overrides (visible only with manage roles) — opens the overrides modal directly. See Permission overrides.
- Remove member — removes the user's assignments at this node. They keep any assignments they have on other nodes. Confirmation prompt before the destructive action.
The Owner role is protected
The Organization always has an Owner role with every permission, and members in the Owner role:
- Can't be removed via this UI.
- Can't have the Owner role removed from them.
- See every team and member in the workspace regardless of other restrictions.
If you really need to demote an Owner — for example when a primary admin leaves — promote someone else to Owner first, then remove the original. Removing the only Owner is intentionally hard.
Inherited vs direct roles
A role assigned to a parent node, with the propagating flag set, appears on the member's chips at every descendant node — but as an outline chip, not a subtle-fill one. Inherited roles can't be removed at the descendant; you'd have to remove them at the propagating node (or remove the role's propagating flag entirely).
This visual distinction lets you tell at a glance whether someone got a permission "from above" or directly here.
Permissions to manage members
Adding, removing, and inviting members all require permission to manage teams at the active scope (or higher up in the tree). Without it, the action menu and Add member button are hidden. Members without this permission still see the team membership list but can't change anything.