Creating a report
Walk through the report drawer end-to-end — for Segments, Campaigns, Months, and Placements report types.
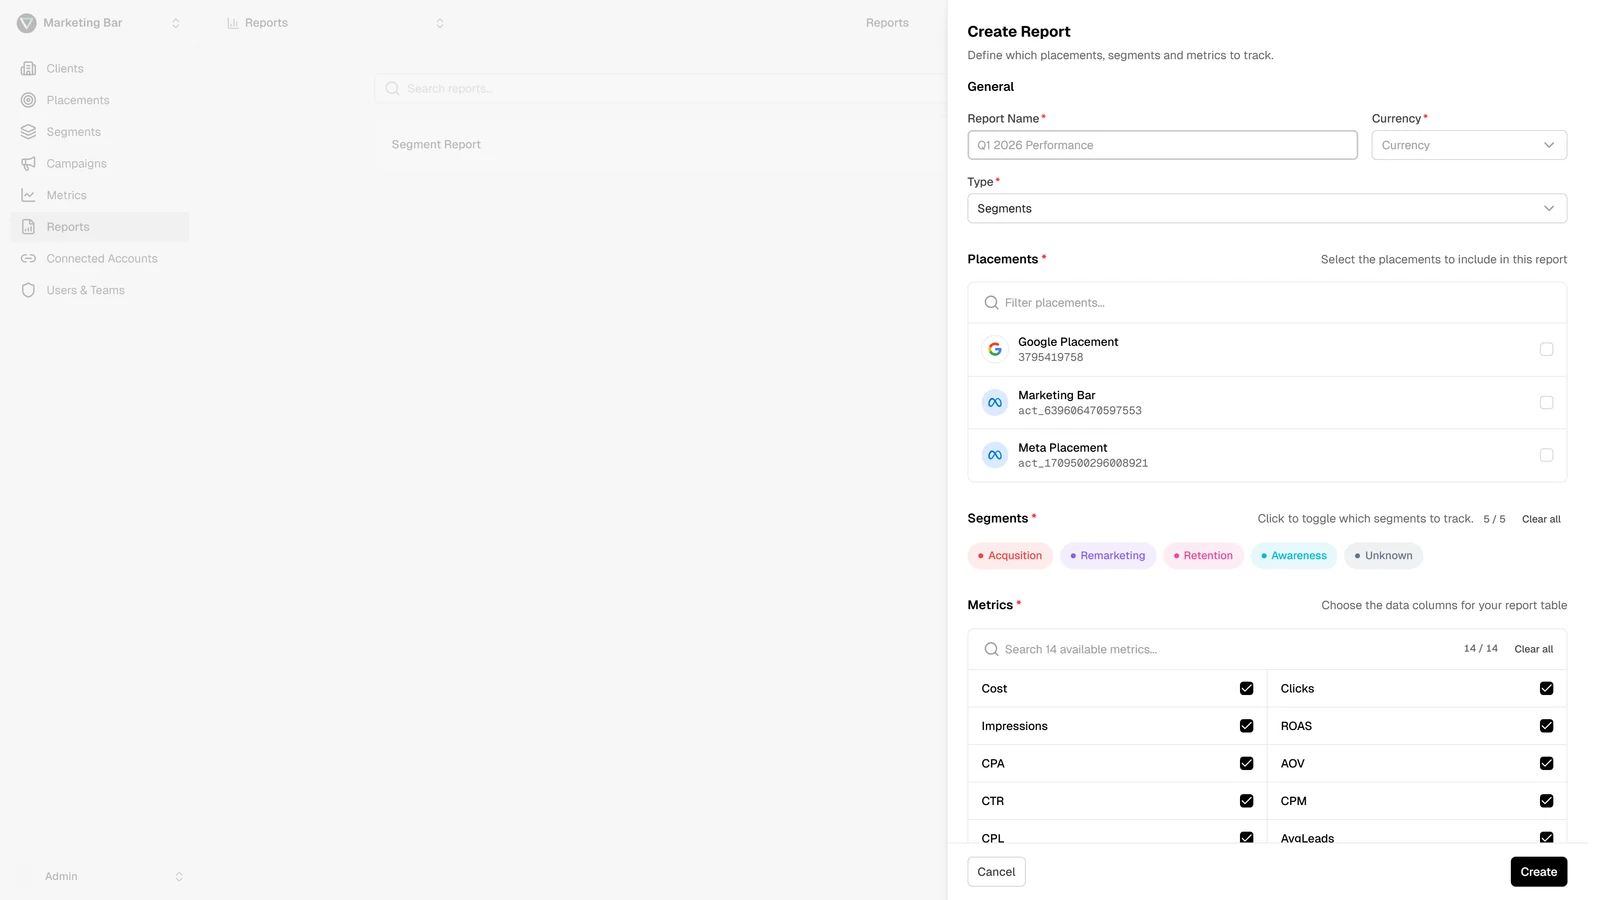
Click Create Report on the reports page (top right). The report drawer slides in. The drawer is a single form with sections that show or hide depending on the report type.
General
Three fields at the top:
- Report name (required). Free text, e.g. Q1 2026 Performance. Used everywhere — the table, the report switcher, the report header.
- Currency (required). Dropdown of the currencies the active client tracks. This is the reporting currency — every monetary metric in the report is converted into this currency at display time, regardless of each placement's native currency.
- Type (required, create-only). Dropdown with the four options: Segments, Campaigns, Months, Placements. You cannot change the type after creation — to switch, create a new report.
Placements
Multi-select with search by name and external ID. Picks one or more placements from the active client whose data the report will aggregate.
This section is hidden for Placements-type reports — there, placements are organized into groups (see below), not selected as a flat list.
For all other types, at least one placement is required.
The list shows platform icons next to each placement so you can see at a glance which are Google Ads vs Meta.
Segments (Segments report only)
Multi-select shown as toggle buttons coloured to match each segment. Includes:
- Select all / Clear all at the top.
- A counter —
5 / 12 selected.
For Segments-type reports, at least one segment is required. Campaigns inside the report's placements that aren't tagged with any of the chosen segments are excluded from the rollup.
Groups (Placements report only)
A draggable list of placement groups. Each group has:
- A name (free text).
- A placement set — which placements belong to this group.
- An edit button that opens the group modal.
- A delete button.
Drag the handle on the left to reorder; the group order on this list is the row order in the resulting report.
Add group opens the group modal:
- Name — required, free text.
- Placements — multi-select with filter; at least one required.
Examples:
- Group Paid social with 3 Meta placements.
- Group Paid search with 2 Google Ads placements.
- Group PMax with 1 Google Ads PMax placement.
For Placements-type reports, you need at least one group with at least one placement in it.
Metrics
A two-column grid showing every available metric — both system (Purchases, Revenue, Lead) and custom — plus a search box and Select all / Clear all. Counter underneath shows X / Y selected.
Pick the metrics you want as columns in the report. At least one is required.
Save
Click Save. Level saves the report, shows a toast, closes the drawer, and refreshes the reports list. The new report appears at the top.
Editing an existing report
Open the row's overflow menu and choose Edit. The same drawer reopens with everything pre-filled. You can change anything except the type — that field is hidden in edit mode.
For Placements reports specifically, edit lets you reorder groups (drag), rename them, change which placements belong to which group, and add or remove groups entirely.
Validation cheat sheet
The Save button stays disabled until:
- Name is non-empty.
- Currency is picked.
- Type is picked (create only).
- At least one metric is selected.
- For non-Placements types: at least one placement is selected.
- For Segments type: at least one segment is selected.
- For Placements type: at least one group exists, every group has a name, every group has at least one placement.